CyberPipe v5.1 is out with a few targeted improvements to make live response a bit smoother.
What’s New:
Collection profiles can now be passed directly as arguments using -CollectionProfile. No need to modify the script or hardcode anything — just run with the profile you need.
Improved support for saving to network shares, ideal for remote collections triggered by EDR.
Better error handling and logging, including clearer messages when tools are missing or when BitLocker key recovery fails.
The default profile still covers the most common triage needs:
✔️ Memory dump (RAM)
✔️ Pagefile
✔️ Volatile data (network config, hives, running procs)
✔️ System artifacts
But now, you can swap that out on the fly:
Usage Examples:
.\CyberPipe.ps1 ## default profile, capture RAM, Pagefile, Volatile and System Files

.\CyberPipe.ps1 -CollectionProfile RAMOnly ## just the RAM

.\CyberPipe.ps1 -CollectionProfile RAMSystem ## just the RAM and System Files (triage lite)

.\CyberPipe.ps1 -CollectionProfile RAMPage ## RAM & Pagefile

.\CyberPipe.ps1 -CollectionProfile Volatile ## Just Volatile data
Useful for tailoring collections based on available time, scope, or system stability — especially during incident response where conditions change quickly.
CyberPipe still captures memory with DumpIt or RAM Capture, grabs volatile system data, checks for encryption, and recovers the BitLocker key when possible. But now it’s just a bit easier to tailor to the job at hand — whether you’re responding interactively or invoking it remotely via EDR integration.
As always, no dependencies beyond what’s in the Tools folder, and no assumptions about the system you’re collecting from.
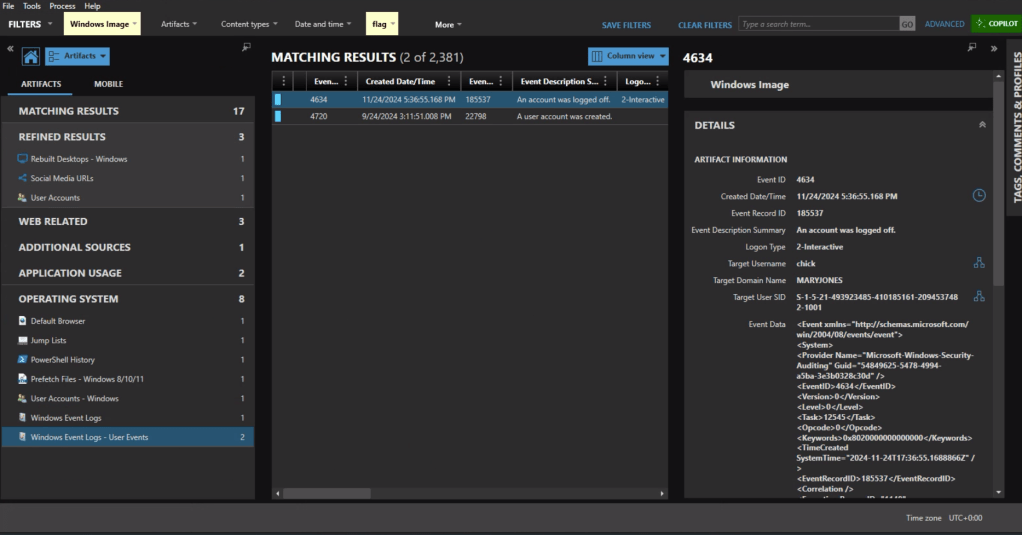
If we jump into Axiom and head to the User Accounts, we can see that the SID for chick is S-1-5-21-493923485-410185161-2094537482-1001.
Windows Event Logs will track user login and logoff activity. The primary event IDs for Windows logoff are: 1. Event ID 4647: This is logged when a user manually initiates a logoff process. It is typically associated with interactive and remote-interactive logon types and indicates user-initiated activity. 2. Event ID 4634: This is logged when a logon session is terminated and no longer exists. It can result from system actions (e.g., idle timeout or shutdown) rather than explicit user action. It often follows Event ID 4647 if the logoff was user-initiated.
In Axiom we can find the most recent 4634 event at 11/24/2024 5:36:55 PM, formatted for the challenge as 2024-11-24 17:36:55.
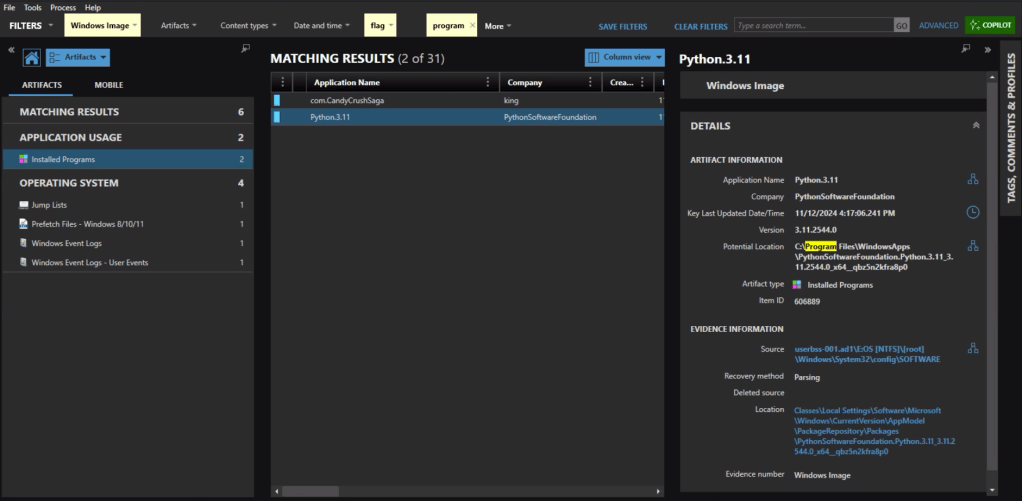
In the Installed Programs under Application Usage we can see that com.CandyCrushSaga was installed. This is the package name for Candy Crush.
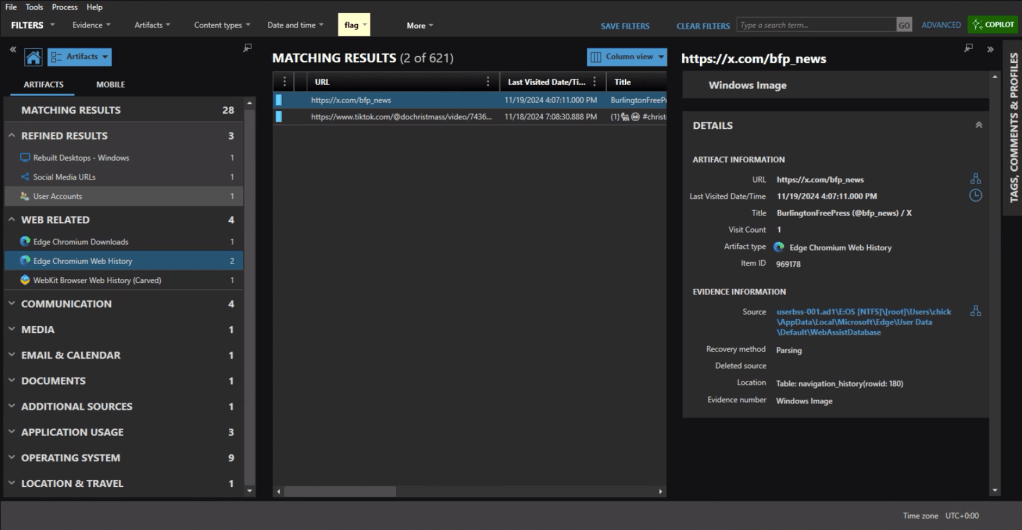
Under the Web Related artifacts, specifically Edge Chromium Web History we can see traffic to https://x.com/bfp_news which is the Twitter/X site for Burlington Free Press.
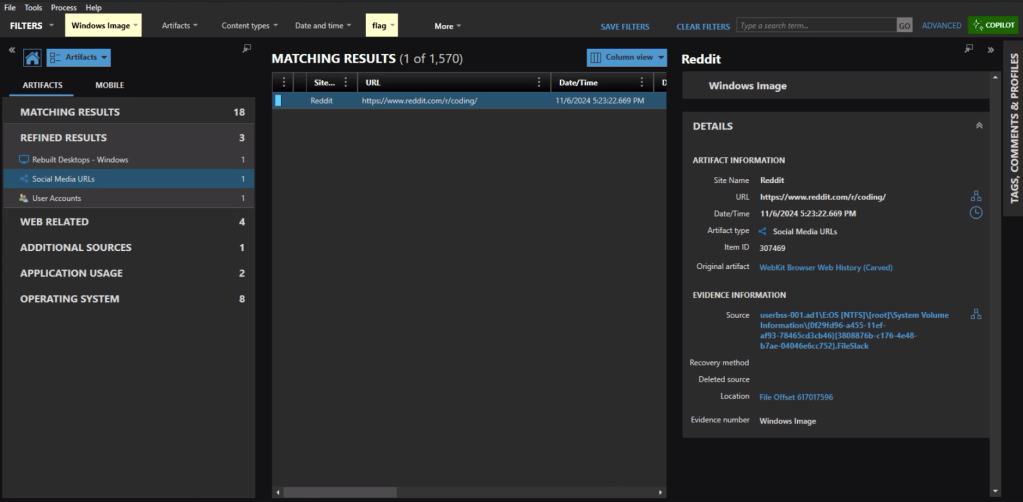
Refined Results, Social Media URLs, shows that the user visited the subreddit of https://reddit.com/r/coding.
The question itself practically gives it away, but we’ll check the Installed Programs to be safe. Sure enough the user had Python installed.
Event ID 4720 is a Windows Security Log event that is generated whenever a new user account is successfully created on a system. The creation date for Mary’s account is 2024-09-24 15:11:51.
As someone who used to geocache frequently, this question was a pleasant surprise. Already having an account on geocaching.com also helped.
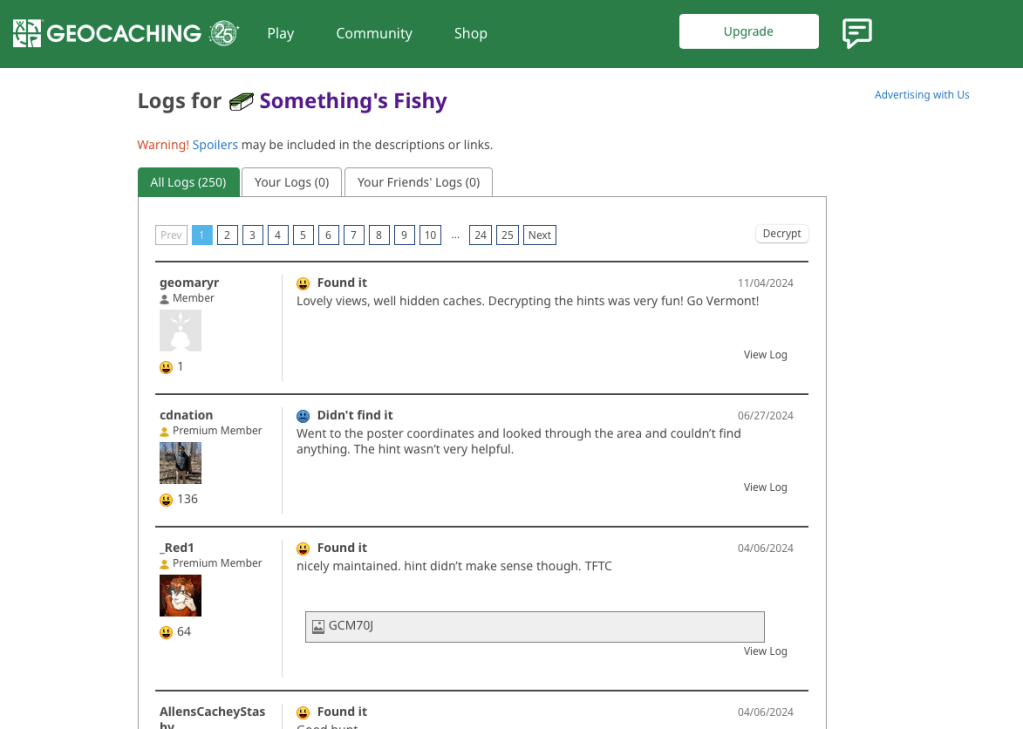
There’s a fair amount of results if you search on geocaching, but there is only reference in the history to an actual geocache location (GCM70J) titled “Something’s Fishy.”
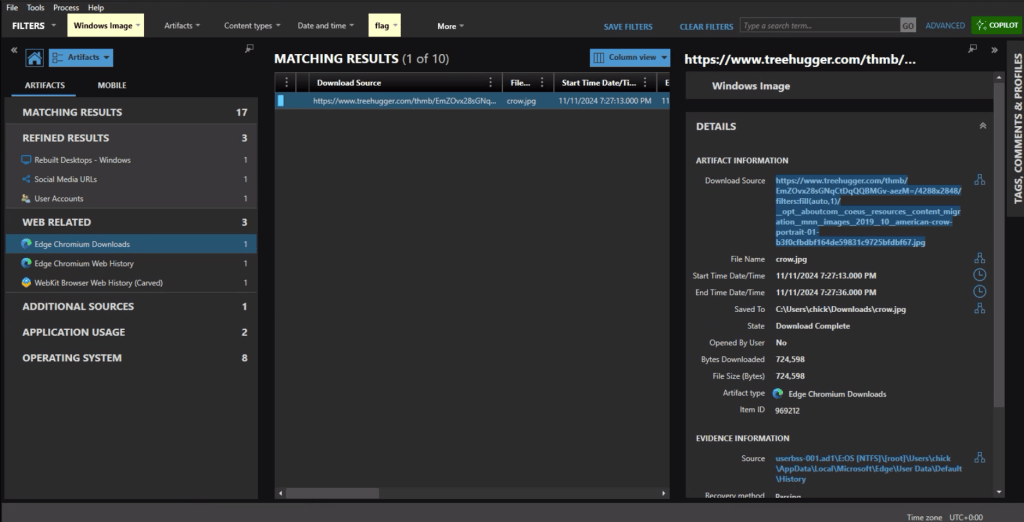
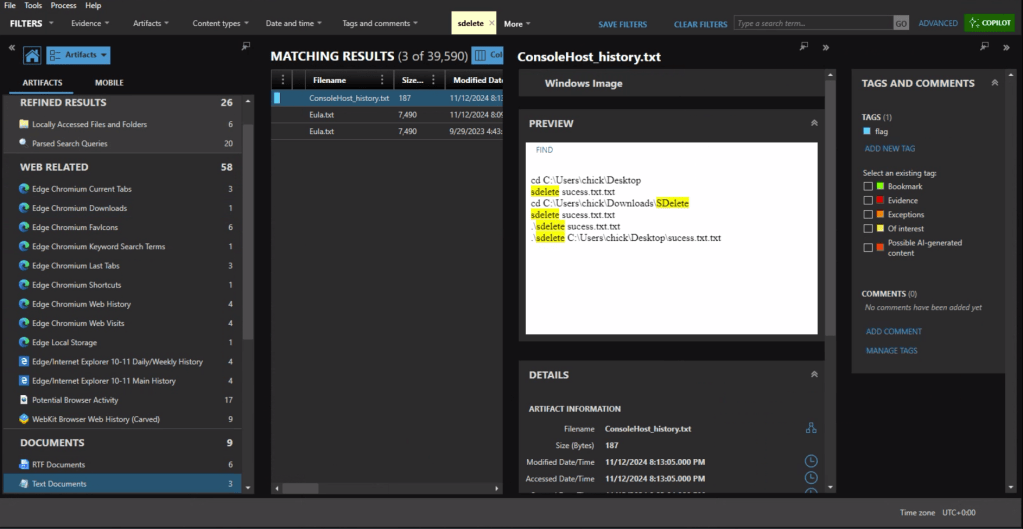
First we need to identify what counter-forensics tools may have been in use. In the user’s download activity we see that SDelete was downloaded.
If we look at the PowerShell history, ConsoleHost_history.txt, we can see that the command sdelete success.txt.txt was executed.
There are multiple evidence items indicating that the user was also using Proton Mail on the device with the account hackergotyou@proton.me.
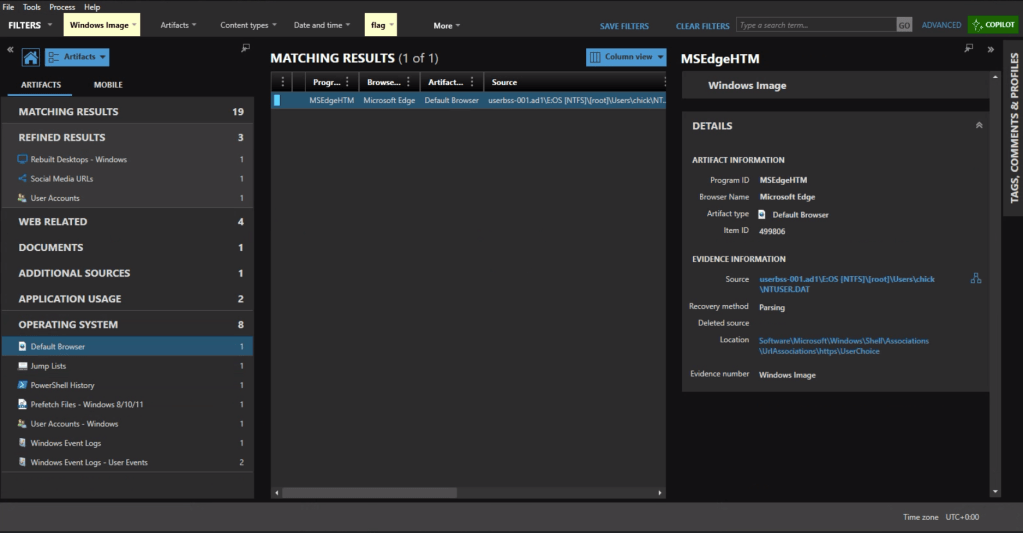
The default browser can be identified from the Registry at Software\Microsoft\Windows\Shell\Associations\UrlAssociations\https\UserChoice. In this instance the user was using Edge, the default, as their browser.
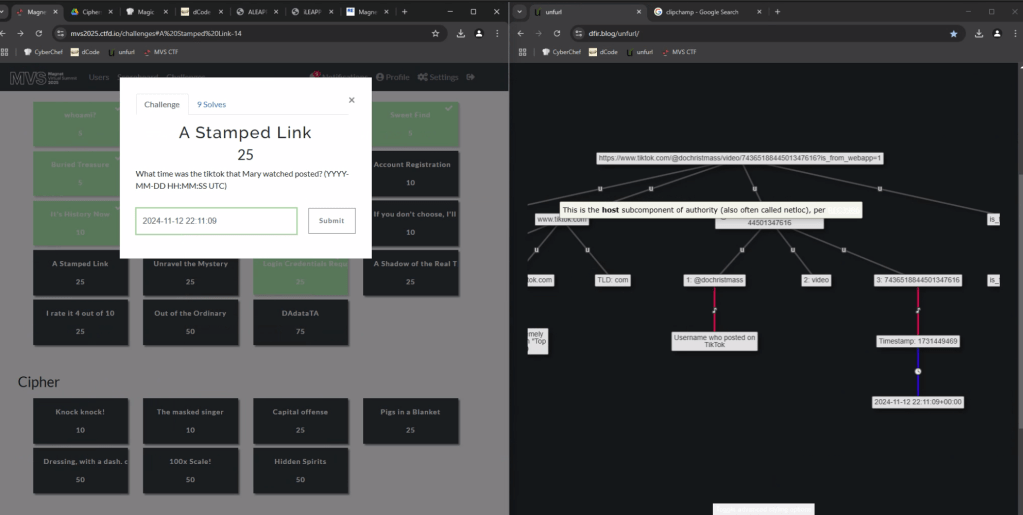
To get the time the video was posted, we can copy the url into UNFURL. This reveals the timestamp the video was posted as 2024-11-22 22:11:09.
Again with a filter on ‘geocaching’ we see a fair amount of activity. There is a url with “join” that appears to be part of the user sign in, including username=geomaryr
We also have an entry under Edge Chromium Autofill, as the user opted to save the login ID on that page.
Lastly we can double-check the geocaching.com site with the log for “Something’s Fishy” which matches the timestamp of the web activity. geomaryr is Mary’s username on geocaching.com
The first thought would be to go to the Passwords and Tokens Refined Result. We see a hash for the chick user account. But Wait!
The key is in “Shadow.” It’s not the Windows account we’re looking for.
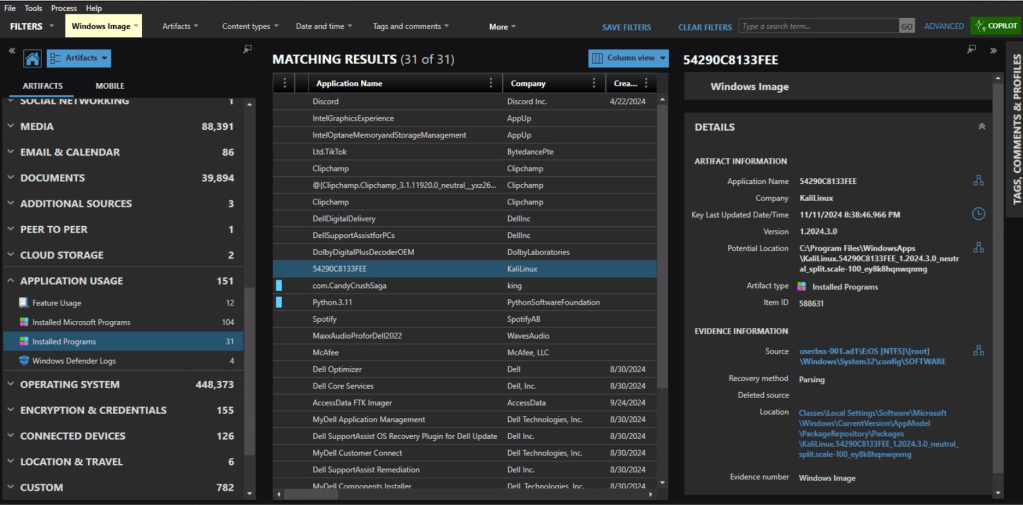
Looking at Installed Programs we identify that the user installed KALI in Windows Subsystem for Linux (WSL). I knew I wanted to get the /etc/shadow file from the KALI installation – but I was hitting a wall on how.
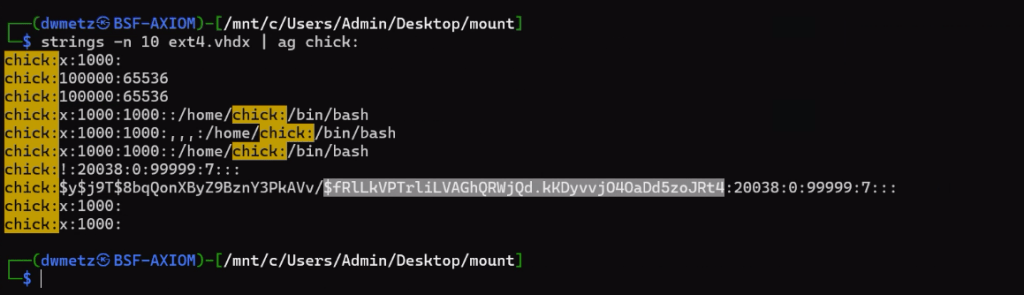
Finally I wound up exporting the ext4.vhdx (the virtual hard drive for the KALI instance) and running strings against it, and piped the results to ag (grep on steroids) with a search for ‘chick:’.
Much like the way my father would describe my shots back when we would play golf together, ugly but effective. The hash for the user account chick is $fRLLkVPTrLiLVAGhQRWjQd.kKDyvvj040aDd5zoJRt4.
There were a few more challenges under the Windows category but that was as far as I made it in the time allotted.
I hope you’ve enjoyed these walk throughs on my approach to solving the challenges.
If you’d like to access the images used for the CFT for your own training and investigation, you can find them at https://cfreds.nist.gov/all/Hexordia/2025MVSCTF. In addition to the Windows 11 image used here, there is also full file system extractions of Android and iOS, as well as two Google Takeout exports. It’s a great reference set for practicing.
In an earlier post titled “Growing Your Malware Corpus”, I outlined methods for building a comprehensive test corpus of malware for detection engineering. It covers using sources like VX-Underground for malware samples and details how to organize and unzip these files using Python scripts.
In today’s post we’re going to cover using Python to apply a standard naming methodology to all our malware samples.
Depending on where you curate your samples from, they could be named by their hash, or as they were identified during investigation, like invoice.exe. Depending on the size of your collection, I’d surmise it’s highly unlikely that they have a consistent naming format.
I don’t know about you, but a title that indicates the malware family and platform is a lot more useful to me than a hash value when perusing the corpus for a juicy malware sample. We can rename all our malware files using Python and the command line utility for Windows Defender.
Step 1: You’ll need to install Python on a Windows box that has Windows Defender.
Install Python
If you don’t have Python installed on your Windows machine, you can do so by downloading the installer from python.org, or alternatively, installing from the Windows store.
Windows Store installer for Python versions 3.7 to 3.12
Directory Exclusion
Within the Windows Defender Virus & Threat protection settings, add an exclusion for the directory you’re going to be using with the malware. Make sure the exclusion is in place before connecting the drive with the malware so it doesn’t get nuked.
Note: Doing this assumes you’ve evaluated the potential risks associated with handling malware, even in controlled settings, and have taken safety precautions. This is not an exercise to be conducted on your corporate workstation.
Screenshot of the D:\Malware Directory being excluded from Windows Defender.
Automatic Sample submission
It’s up to you if you want to disable the Automatic Sample submission. If you do, you’ll still may get prompted to send some.
Automatic Sample Submission turned off in Windows Defender Configuration.Windows Defender requesting to send samples to Microsoft for further analysis.
Rename_Malware.py
The star of this show is the python script that was shared on twitter from vx-underground.
The post walks through various options for utilizing Windows Defender command line, MpCPmdRun.exe. Using that information a Python script was developed to loop through the contents of a directory, analyze those files with Windows Defender, and then rename the files accordingly based on the malware identification.
Python code for rename_malware.py in VS Code.
You can grab the code from the linked post, or a copy on my Github here.
Once you’ve got Python installed, directory exclusion configured, and a pocketful of kryptonite (malware), – you’re ready to go.
python rename_malware.py D:\Malware
Windows Defender command line will run through each file and rename them based on its detection.
The script recursively renames the analyzed files.
I’m running this on a copy of my malware corpus of 30,000+ malware samples.
Counting the Corpus
A bit of handy PowerShell math. Before and after the process I wanted to be sure of how many files were present to ensure that the antivirus didn’t remove any. I also wanted to exclude counting pdfs as many of the samples in my corpus also have accompanying write-ups.
The script continues recursively renaming the analyzed files.Energizer Rabbit. “Still Going!”
Finally… not begrudgingly at all considering over 30,000 samples were analyzed, the script has reached the end of the samples.
Script has reached the end of the files.
If we do a directory listing on the contents of the malware directory, we see that the majority of the files have all been renamed based on their malware identification.
File listing showing malware files named Trojan.Powershell… Trojan.Script… etc.
Hooray!
That makes it much easier to search and query through the malware repository.
The latest update to CyberPipe (the code formerly known as CSIRT-Collect), has been revised to leverage the free triage collection tool, MAGNET Response. As with previous versions it also runs Encrypted Disk Detector, another free tool from MAGNET.
Script Functions:
Capture a memory image with MAGNET DumpIt for Windows, (x32, x64, ARM64), or MAGNET RAM Capture on legacy systems,
Create a Triage collection* with MAGNET Response,
Check for encrypted disks with Encrypted Disk Detector,
Recover the active BitLocker Recovery key,
Save all artifacts, output and audit logs to USB or source network drive.
The setup is simple. Save the CyberPipe script to a USB drive. Next to the script is a Tools folder with the executables for MAGNET Response & EDD. Before running, customize the script to select a collection profile. Run the script from the USB drive and collect away. Move on to the next PC and run it again.
Network Usage:
CyberPipe 5 also has the capability to write captures to a network repository. Just un-comment the # Network section and update the \\server\share line to reflect your environment.
In this configuration it can be included as part of automation functions like a collection being triggered from an event logged on the EDR.
Prior Version (KAPE Support):
If you’re a prior user of CyberPipe and want to use the previous method where KAPE facilitates the collection with the MAGNET tools, or have made other KAPE modifications, use v4.01.
Download:
Download the latest release of CyberPIpe on GitHub.


/__opt__aboutcom__coeus__resources__content_migration__mnn__images__2019__10__american-crow-portrait-01-b3f0cfbdbf164de59831c9725bfdbf67.jpg)