Unmasking the Moon: Comparing LunaStealer Samples with MalChela and Claude

As one tends to do on Saturday mornings with coffee in hand, I was reviewing two samples that were attributed to the LunaStealer / LunaGrabber family. Originally I was validating that tiquery was working with the MCP configuration, however what started as a quick TI check turned into a full static analysis session — and it gave me a good opportunity to put the MalChela MCP integration through its paces in a real workflow. This post walks through how that investigation unfolded, what the pivot points were, and what we found at the bottom of the rabbit hole.


The Setup

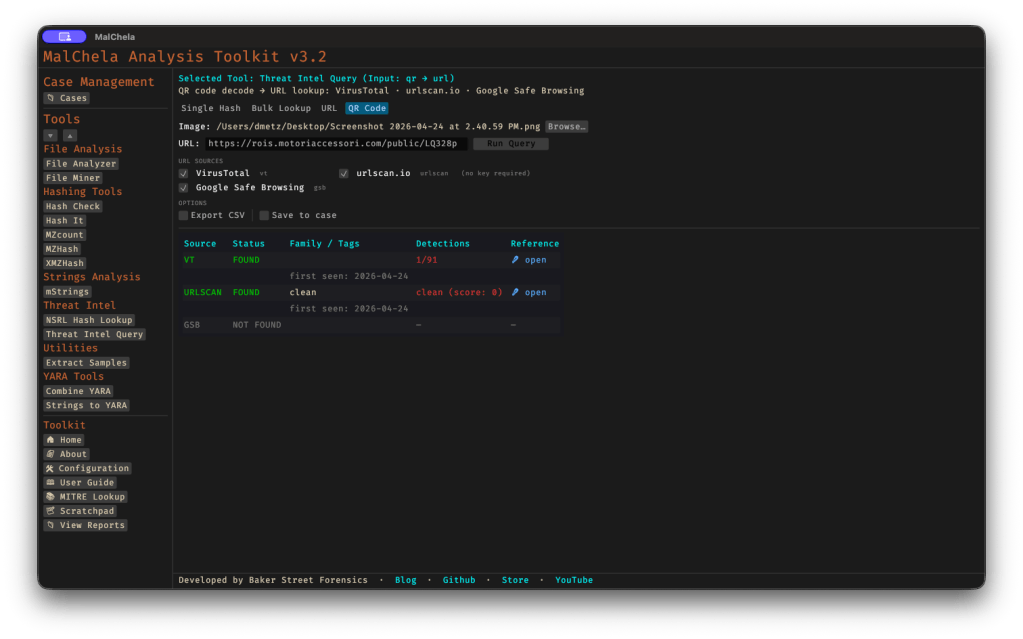
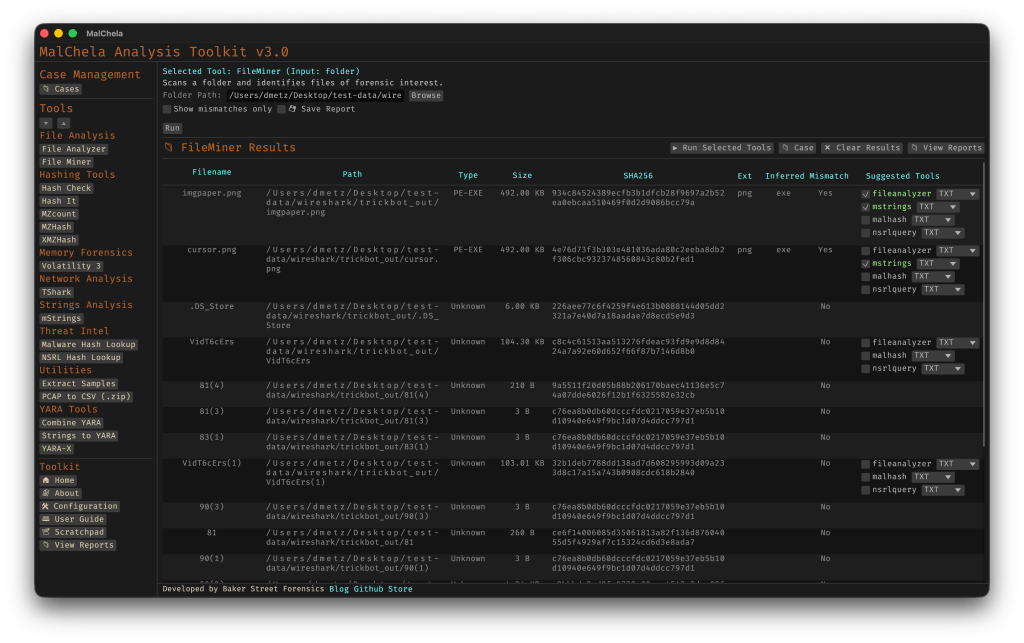
If you haven’t seen the MalChela MCP plugin before, the short version is this: MalChela is a Rust-based malware analysis toolkit I’ve been building for a while — tools like tiqueryfileanalyzermstrings, and others. The MCP server exposes all of those tools to Claude Desktop natively, so instead of dropping to the terminal for every command, I can run analysis steps conversationally and let Claude help interpret the results and suggest next moves.

This is not replacing the terminal — it’s augmenting it. The pivot decisions still come from the analyst. But having a reasoning layer that can look at mstrings output and say “that SetDllDirectoryW + GetTempPathW combination is staging behavior, and here’s the ATT&CK mapping” is genuinely useful when you’re moving fast.

Both samples were sitting in a folder on my Desktop. I had SHA-256 hashes. Let’s go.


Phase 1: Threat Intelligence Query

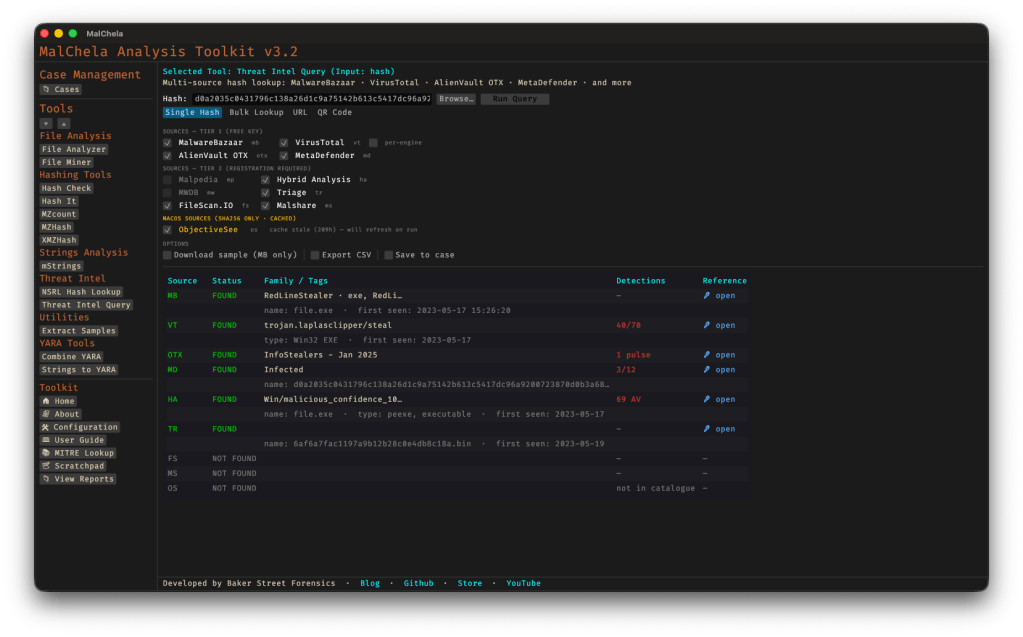
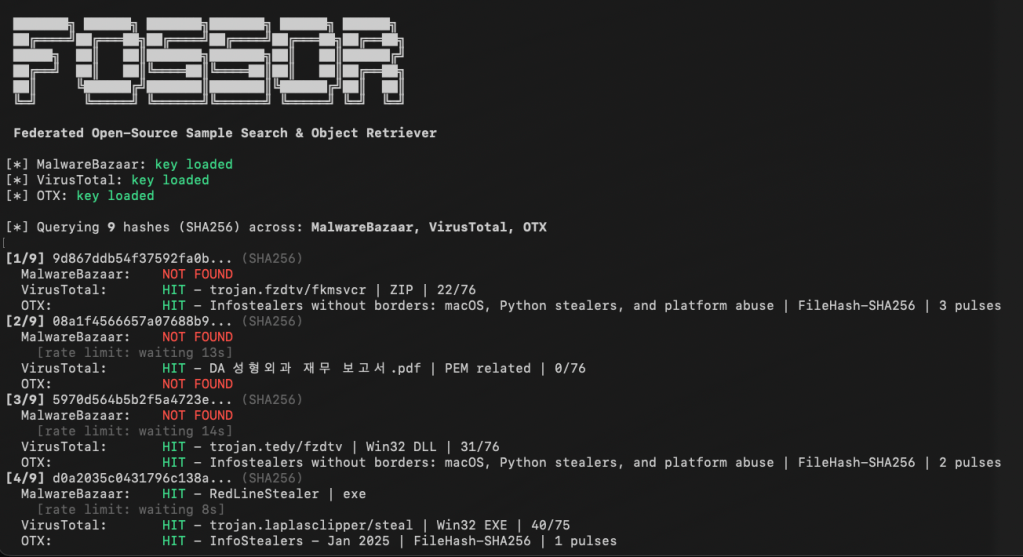
First move is always TI. The MalChela tiquery tool hits MalwareBazaar, VirusTotal, Hybrid Analysis, MetaDefender, and Triage simultaneously and returns a combined results matrix. Two calls, two answers.

Sample 1 (4f3b8971...) came back confirmed LunaStealer across all five sources. First seen 2025-12-01. Original filename sdas.exe. VT tagged it trojan.generickdq/python — already telling us something about the build.

Sample 2 (d4f57b42...) was more interesting. MalwareBazaar returned both LunaGrabber and LunaStealer tags. Triage clustered it with BlankGrabber, GlassWorm, IcedID, and Luca-Stealer. The original filename was loader.exe. That’s a different kind of name than sdas.exe. One sounds like a throwaway test artifact. The other sounds deliberate.

The TI results alone suggested these weren’t just two copies of the same thing. They were potentially different components of the same campaign.


Phase 2: Static PE Analysis

fileanalyzer and mstrings on both samples.

The first thing that jumped out was the imphash — f3c0dbc597607baa2ea891bc3a114b19 — identical on both. Same section layout, same section sizes, same import count (146), same 7 PE sections including the .fptable section that PyInstaller uses for its frozen module table. These two samples were compiled from the same PyInstaller loader template with different payloads bundled inside.

But the entropy diverged sharply. Sample 1 (sdas.exe) came in at 3.9 — low, even for a PyInstaller bundle. Sample 2 (loader.exe) was 6.9 — high, indicating the embedded payload is compressed or encrypted more aggressively. Combined with the file size difference (47 MB vs 22 MB), this was the first signal that what was inside each bundle was meaningfully different.

mstrings gave us 22–23 ATT&CK-mapped detections across both samples — largely the same set: IsDebuggerPresentQueryPerformanceCounterSetDllDirectoryWGetTempPathWExpandEnvironmentStringsWOpenProcessToken. Standard infostealer staging behavior. Tcl_CreateThread showed up in both, which is a PyInstaller artifact from bundling Python with Tkinter. The VT python family tag made more sense in context.


Phase 3: PyInstaller Extraction

Both samples were extracted with pyinstxtractor-ng. This is where the two samples started to diverge clearly.

Sample 1 entry point: sdas.pyc — Python 3.13, 112 files in the CArchive, 752 modules in the PYZ archive.

Sample 2 entry point: cleaner.pyc — Python 3.11, 113 files, 760 modules.

The name cleaner.pyc inside a file called loader.exe is a tell. That’s not a stealer payload name. That’s something that runs after.

The bundled library sets were nearly identical between both — requestsrequests_toolbeltCryptodomecryptographypsutilPILsqlite3win32 — same stealer framework. But Sample 2 had a unique addition: a l.js reference (mapped to T1059 — Command and Scripting Interpreter). A JavaScript component not present in the December build. The OpenSSL versions also differed: Sample 1 bundled libcrypto-3.dll (OpenSSL 3.x), Sample 2 had libcrypto-1_1.dll (OpenSSL 1.1). Different build environments, roughly one month apart.

At this point the working theory was solid: Sample 1 is a standalone stealer. Sample 2 is a later-generation dropper/installer with an updated payload and additional capability.


Phase 4: Bytecode Decompilation

decompile3 couldn’t handle Python 3.11 or 3.13 bytecode. That’s a known limitation. pycdc (Decompyle++) handles both.

sdas.pyc decompiled cleanly — the import stack made the capability set immediately obvious:

from win32crypt import CryptUnprotectData
from Cryptodome.Cipher import AES
from PIL import Image, ImageGrab
from requests_toolbelt.multipart.encoder import MultipartEncoder
import sqlite3

CryptUnprotectData for browser master key decryption. AES for the decryption itself. ImageGrab for screenshots. MultipartEncoder for structured exfiltration. Classic infostealer, nothing surprising.

cleaner.pyc was a different story. The decompiler output opened with this:

__________ = eval(getattr(__import__(bytes([98,97,115,101,54,52]).decode()), ...

Heavy obfuscation — byte arrays used to reconstruct evalgetattr, and __import__ at runtime so none of those strings appear in plain text. The approach is designed to evade static string detection. Decode the byte arrays and you get:

bytes([98,97,115,101,54,52]) → "base64"
bytes([90,88,90,104,98,65,61,61]) → b64decode("ZXZhbA==") → "eval"
bytes([90,50,86,48,...]) → "getattr"
bytes([88,49,57,112,...]) → "__import__"

Standard Python malware obfuscation. But buried further down in the decompile output was a large binary blob — a bytes literal starting with \xfd7zXZ. That’s the LZMA magic header.


Phase 5: LZMA Stage 2 Extraction

The blob was located at offset 0x17d4 in the pyc file. Extract and decompress it:

import lzma
blob = open('cleaner.pyc', 'rb').read()
idx = blob.find(b'\xfd7zXZ')
decompressed = lzma.decompress(blob[idx:])
# → 102,923 bytes

One important detail: the decompression is wrapped in a try/except LZMAError block with os._exit(0) on failure. If the decompression fails — as it would in some emulated sandbox environments — the process exits silently with no error. That’s the anti-sandbox mechanism.

The decompressed payload was another obfuscated Python source using a custom alphabet substitution encoding. The final execution chain was compile() + exec(). Decoding the full stage 2 revealed everything:

The injection URL:

https://raw.githubusercontent.com/Smug246/luna-injection/main/obfuscated-injection.js

This is the live Discord injection payload. The stage 2 pulls this JavaScript file from GitHub and injects it into the Discord desktop client’s core module, persisting across restarts.

The capability set from stage 2:

  • Anti-analysis checks on startup: process blacklist (~30 entries including wiresharkprocesshackervboxserviceollydbgx96dbgpestudio), MAC address blacklist (80+ VM prefixes), HWID blacklist, IP blacklist, username/PC name blacklists
  • Discord token theft from all three release channels (stable, canary, PTB)
  • Browser credential theft across 20+ Chromium and non-Chromium browsers
  • Roblox session cookie harvesting (.ROBLOSECURITY= targeting with API validation)
  • Desktop screenshot capture
  • Self-destruct: ping localhost -n 3 > NUL && del /F "{path}"

The ping delay is a simple trick — the 3-second wait lets the process fully exit before the delete fires, so the file removes itself cleanly after execution.


What MalChela + MCP Added to This Workflow

The honest answer is: speed and synthesis.

tiquery hitting five TI sources in one call versus five separate browser tabs or CLI invocations is a meaningful time saving, but that’s the surface benefit. The deeper value showed up in the mstrings step — getting ATT&CK-mapped output with technique IDs alongside the raw strings meant the behavioral picture came together faster than manually correlating imports against the ATT&CK matrix.

The MCP integration meant each of those steps — TI query, PE analysis, string extraction — could happen within the same conversation context. Claude could see the fileanalyzer output and the mstrings output together and note that the entropy difference between the two samples was significant, that the identical imphash meant shared loader infrastructure, that the staging imports in mstrings were consistent with the exfil approach suggested by the TI tags. That cross-tool synthesis is where the integration earns its keep.

The parts that still required manual work: pyinstxtractor-ngpycdc, the LZMA extraction, and decoding the stage 2. Those are terminal steps on the Mac.


IOCs at a Glance

Samples:

SHA-256FilenameFamily
4f3b8971...d0sdas.exeLunaStealer
d4f57b42...24loader.exeLunaGrabber

Injection URL:

https://raw.githubusercontent.com/Smug246/luna-injection/main/obfuscated-injection.js

Self-destruct pattern:

ping localhost -n 3 > NUL && del /F "{executable}"

Imphash (shared loader stub):

f3c0dbc597607baa2ea891bc3a114b19

A full IOC list including ~60 C2 IPs, MAC address blacklists, and HWID blacklists is in the analysis report linked below.

Downloads

  • 📄 [Full Analysis Report] — Complete investigation narrative, sample properties, capability breakdown, IOC documentation, campaign timeline, and recommendations. (LunaStealer_Analysis_Report.pdf)
  • 🛡️ [YARA Rules — PE] — Four rules targeting the PE samples: exact hash match, shared PyInstaller stub (imphash-based), infostealer payload strings, generic PyInstaller infostealer. (lunastealer_pe.yar)

If you’re running MalChela in your environment and want to reproduce the TI query steps, the MalChela MCP plugin source is on GitHub at github.com/dwmetz/MalChela. Questions or additions to the IOC list — find me on the usual channels.


From QR to Threat Identification in one Click

Recently I introduced Threat Intel Query (tiquery), a multi-source threat intelligence lookup tool. The first iteration expanded on the capability of malhash and enabled for the submission of malware hashes against multiple threat intel sites.

Then yesterday I was targeted with an SMS phishing message. (Note: I don’t know why but I detest the term ‘smishing‘, or any of the other ‘ishings that have been used to describe these tactics.) The message was one of those outstanding traffic violations ‘Final Court Notice’ type scare tactics. Instead of a URL it had a QR code.

This inspired me to add some additional capability to tiquery. I’ve added URL support, that will query against VirusTotal, urlscan.io and Google Safe Browsing. As with all the other sources, API keys are required.

I also added a QR decoding capability, so you can browse to a screenshot of a QR code and tiquery will decode it, and then submit the URL to the Threat Intel lookups.

This was a fairly new sample and the url had been created just hours before.

Version 3.2.1 also adds the ability, when you’re in hash submission, to browse to a file. Only the hash, not the file, gets submitted – it just combines two steps into one.

Support for Recorded Future Tri.ge (researcher account) has also been validated. On that note, if you’re a member at Malpedia and would like to send me an invite, it would be much appreciated.

You can find the full documentation for tiquery including command line syntax in the User Guide within MalChela, or via the online docs here.

Streamline Malware Hash Search with FOSSOR

We’ve all encountered this scenario: you’re reading a threat report from CISA or Microsoft and come across hashes related to a malware infection. You start copying these hashes and head to one of your favorite virus repositories to check if there’s a source available for download so you can analyze the malware yourself. Unfortunately, you don’t find a match. So, you move on to another site and repeat the process. This can be time-consuming and prone to errors.

FOSSOR (Federated Open-Source Sample Search & Object Retriever) is a script designed to help you search for malware hashes across multiple threat intelligence sources. Simply run FOSSOR and provide it with a single hash or a text file of hashes (.txt or .csv). It will instantly display which sources have information about the hash, and you can even download samples if needed.

Setup

FOSSOR loads API keys from text files in the same directory as the script. Create one file per source containing only the key:

SourceKey fileWhere to get a key
MalwareBazaarmb-api.txtabuse.ch Auth Portal
VirusTotalvt-api.txtVirusTotal API
AlienVault OTXotx-api.txtOTX Account Settings

Sources with missing key files are automatically skipped. You only need the sources you have access to.

fossor/
fossor.py
mb-api.txt # your MalwareBazaar key
vt-api.txt # your VirusTotal key
otx-api.txt # your OTX key
samples/ # created automatically by --download

Usage

Look up hashes from a file

python3 fossor.py hashes.txt

The input file should have one hash per line. Lines starting with # are treated as comments and ignored. Works with .txt.csv, or any text file — BOM and stray whitespace are handled automatically.

Look up a single hash

python3 fossor.py d0a2035c0431796c138a26d1c9a75142b613c5417dc96a9200723870d0b3a687

Export results to CSV

python3 fossor.py hashes.txt --csv results.csv

Download available samples

python3 fossor.py hashes.txt --download

Downloads are saved to ./samples/ as password-protected zips. The password is always infected.

Warning: Downloaded samples are live malware. Handle with appropriate caution — use a VM or isolated analysis environment. Consider excluding the samples/ directory from antivirus real-time scanning and Spotlight indexing.

Disable specific sources

python3 fossor.py hashes.txt --no-vt # skip VirusTotal
python3 fossor.py hashes.txt --no-mb --no-otx # only query VirusTotal

Combine options

python3 fossor.py hashes.txt --csv results.csv --download --no-vt

Example Output

[*] MalwareBazaar: key loaded
[*] VirusTotal: key loaded
[*] OTX: key loaded
[*] Querying 9 hashes (SHA256) across: MalwareBazaar, VirusTotal, OTX
[1/9] 9d867ddb54f37592fa0b... (SHA256)
MalwareBazaar: NOT FOUND
VirusTotal: HIT - trojan.fzdtv/fkmsvcr | ZIP | 22/76
OTX: HIT - Infostealers without borders... | FileHash-SHA256 | 3 pulses
[2/9] d0a2035c0431796c138a... (SHA256)
MalwareBazaar: HIT - RedLineStealer | exe
VirusTotal: HIT - trojan.laplasclipper/steal | Win32 EXE | 40/75
OTX: HIT - InfoStealers - Jan 2025 | FileHash-SHA256 | 1 pulses
============================================================
Summary: 9 hashes queried across 3 sources
MalwareBazaar: 1/9 found
VirusTotal: 6/9 found
OTX: 5/9 found
Unique hashes with at least one hit: 7/9
Results Matrix:
Hash Malwar VT OTX
------------------ ------ ------ ------
9d867ddb54f37592fa - HIT HIT
08a1f4566657a07688 - HIT -
5970d564b5b2f5a472 - HIT HIT
d0a2035c0431796c13 HIT HIT HIT
59855f0ec42546ce2b - - -
a5b19195f61925ede7 - HIT HIT
e7237b233fc6fda614 - HIT -
59347a8b1841d33afd - - HIT
e965eb96df16eac926 - - -
============================================================

Rate Limits

SourceLimitFOSSOR default
MalwareBazaarNone documentedNo delay
VirusTotal (free)4 requests/min15s between requests
AlienVault OTX10,000 requests/hrNo delay

Download

You can download FOSSOR for free on GitHub: https://github.com/dwmetz/FOSSOR/

MalChela v3.0: Case Management, FileMiner, and Smarter Triage

With the release of MalChela v3.0, I’m introducing features that shift the focus from tool-by-tool execution to a more structured investigative workflow. While the core philosophy of lightweight, file-first analysis remains unchanged, this version introduces smarter ways to manage investigations, track findings, and automate common analysis patterns, all with minimal fuss.

In this post, I’ll walk through the new Case Management system, the replacement of MismatchMiner with FileMiner, and the ability to identify and launch suggested tools — even in batch — based on file characteristics. These changes aim to reduce friction in multi-tool workflows and help analysts move faster without losing visibility or control.

Cases: A Lightweight Way to Stay Organized

Until now, MalChela has operated in an ephemeral mode. You selected a tool, pointed it at a file or folder, and reviewed the output. Any saved results would be grouped by tool, but without much context.

Cases change that. In v3.0, you can start a new case from a file or folder — and everything from that point forward is grouped under that case. Tool outputs are saved to a dedicated case folder, file hashes are tracked, and metadata is preserved for review or reanalysis.

Case Management

You don’t need to create a case for every run — MalChela still supports standalone tool execution. But when you’re working with a malware sample set, an incident directory, or a disk image extract, cases give you the ability to:

  • Save tool results in a consistent location
  • Track analysis history per file
  • Reopen previous sessions with full context
  • Add notes, tags, and categorization (e.g., “suspicious”, “clean”, “needs review”)

Hello FileMiner: Goodbye MismatchMiner

The MismatchMiner tool was originally designed to surface anomalies between file names and actual content — a common trick in malicious attachments or script dropper chains. It worked well, but its scope was narrow.

FileMiner replaces it, expanding the logic to support full file-type classification and metadata inspection across an entire folder. It still flags mismatches, but now it also:

  • Detects embedded file types using magic bytes
  • Groups files by class (e.g., images, documents, executables, archives)
  • Calculates hashes for correlation and NSRL comparison
  • Extracts size, extension, and other key metadata
  • Saves both a human-readable .txt summary and a structured .json report

The output is designed to be used both manually and programmatically — which brings us to one of v3.0’s most important additions: tool suggestions.

The new FileMiner app

Suggested Tools and Batch Execution

Once FileMiner runs, it doesn’t just stop at reporting. Based on each file’s type and characteristics, it can now suggest one or more appropriate tools from the MalChela suite.  These suggestions are surfaced right in the GUI — or in the CLI if you’re running FileMiner interactively. From there, you can choose to launch the recommended tool(s) on a per-file basis or queue up several for batch execution.

This makes it much faster to pivot from triage to deeper inspection. No more switching tools manually or copying paths. You stay within the flow — and more importantly, you reduce the risk of skipping important analysis steps.

CLI and GUI Improvements Aligned

These features are available in both the CLI and GUI editions of MalChela. In the CLI, FileMiner presents an interactive table of results. You can pick a file, see its suggested tools, and choose which one to run. When you’re done, you can return to the table and continue with the next file.

The GUI extends this even further, allowing you to:

  • View and scroll through full case history
  • Run tools with live output streaming
  • Reopen previous FileMiner runs from saved reports
  • Run all suggested tools on all files with one click (if desired)

These features let you treat MalChela more like a toolbox with memory, not just a launcher.


CLI Enhancements:

The command-line interface has also received a quiet but meaningful upgrade. Tool menus are now organized with clear numeric indexes and shortcodes, making it faster to navigate and launch tools without needing to retype full names. This small change goes a long way during repetitive tasks or when working in a time-constrained triage setting.

FileMiner supports an interactive loop: after running a tool on a selected file, you’re returned to the main results table — no need to restart the scan or re-navigate the menu. This allows you to run additional tools on different files within the same dataset, making FileMiner feel more like a lightweight control center for follow-up actions. It’s a subtle shift, but one that significantly reduces friction in batch-style or exploratory workflows.


Closing Thoughts

MalChela 3.0 reflects a steady evolution — not a revolution. It’s built on real-world feedback and a desire to make forensic and malware analysis a little less scattered. Whether you’re a one-person IR team or just trying to stay organized during a reverse engineering exercise, the new case features and smarter triage capabilities should save you time.

If you’ve been using MalChela already, I think this update will feel like a natural (and welcome) extension. And if you haven’t tried it yet, there’s never been a better time to start.

Download: https://github.com/dwmetz/MalChela/releases

User Guide: https://dwmetz.github.io/MalChela/