In a previous post I wrote about integrating MalChela with OpenCode on REMnux and giving the AI a quick briefing on the tool suite so it could incorporate them into its analysis workflow. That was a promising proof of concept, but it raised a natural follow-up question: how do you make these integrations more robust, reproducible, and persistent?
Since that post, I’ve been experimenting with three different approaches to bringing MalChela into AI-assisted workflows — each suited to a different environment and use case. This post walks through all three.
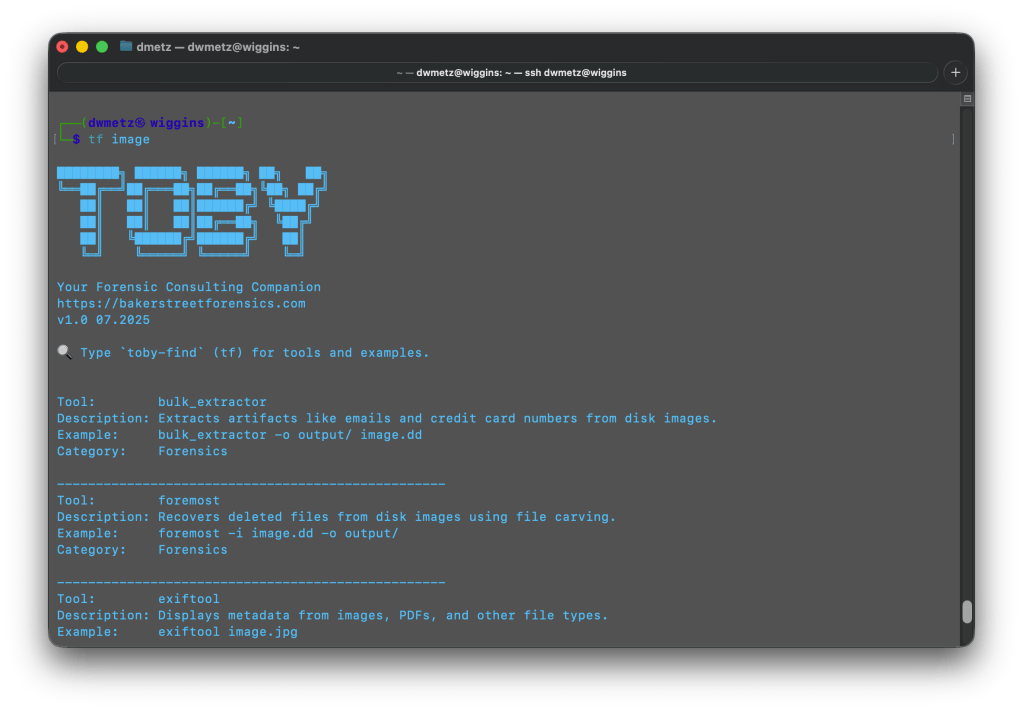
Approach 1: The Kali MCP Server (Toby)
The first implementation started with Toby — my portable Raspberry Pi forensics toolkit running a customized Kali Linux build. Toby is designed for headless operation via SSH, which turns out to be exactly the right architecture for an MCP server. The developers of Kali recently added an update to support MCP integrations. (See https://www.kali.org/blog/kali-llm-claude-desktop/)
Model Context Protocol (MCP) is an open standard that allows AI assistants like Claude to interface with external tools and systems in a structured, reliable way. Instead of pasting instructions into a chat window each session, you define your tools once in a server configuration and the AI has consistent, persistent access to them.
The setup leverages an existing open-source mcp-kali-server that exposes Kali’s forensic and security tooling as MCP tools. On the client side (Mac), the claude_desktop_config.json simply points to Toby (or your Kali box) over SSH:
{ "mcpServers": { "mcp-kali-server": { "command": "ssh", "args": [ "-i", "/Users/dwmetz/.ssh/id_ed25519", "dwmetz@192.168.10.89", "mcp-server" ], "transport": "stdio" } }}
With this in place, Claude Desktop has persistent, session-independent access to Kali’s toolkit running on Toby. No need to re-brief the AI each session — the tools are always available and always described the same way.
Key prerequisite: passwordless SSH key-based auth between your Mac and Toby. If you haven’t set that up:
ssh-keygen -t ed25519ssh-copy-id user@<toby/kali-ip># Then one manual SSH to accept the host key fingerprintssh user@<toby/kali-ip>
Adding MalChela to the Kali MCP Server
The mcp-kali-server ships with routes for Kali’s built-in security tools, but MalChela isn’t included out of the box. Adding it requires changes to two files: kali_server.py (the Flask API backend) and mcp_server.py (the FastMCP frontend). Both live at /usr/share/mcp-kali-server/.
How the architecture works: mcp_server.py is what Claude talks to — it defines MCP tool names, descriptions, and parameter schemas. When a tool is called, it POSTs to kali_server.py, which constructs the actual shell command and executes it on Toby. The critical detail is that MalChela’s binaries must be run from within the MalChela workspace directory — running them from an arbitrary working directory causes failures. The cd {MALCHELA_DIR} && prefix in every command handles this.
kali_server.py changes
Add the MALCHELA_DIR constant (update with your MalChela install path) and Flask routes after the existing tool routes, before the health check endpoint:
# ============================================================# MalChela Tool Routes# Adjust MALCHELA_DIR if MalChela is installed elsewhere# ============================================================MALCHELA_DIR = "/home/dwmetz/tools/MalChela"@app.route("/api/tools/malchela/fileanalyzer", methods=["POST"])def malchela_fileanalyzer(): """MalChela: Hash, entropy, packing detection, PE headers, YARA scan, VirusTotal lookup.""" try: params = request.json filepath = params.get("filepath", "") if not filepath: return jsonify({"error": "filepath parameter is required"}), 400 command = f"cd {MALCHELA_DIR} && ./target/release/fileanalyzer \"{filepath}\"" result = execute_command(command) return jsonify(result) except Exception as e: logger.error(f"Error in malchela_fileanalyzer endpoint: {str(e)}") return jsonify({"error": f"Server error: {str(e)}"}), 500@app.route("/api/tools/malchela/mstrings", methods=["POST"])def malchela_mstrings(): """MalChela: Extract strings, apply Sigma rules, map to MITRE ATT&CK.""" try: params = request.json filepath = params.get("filepath", "") if not filepath: return jsonify({"error": "filepath parameter is required"}), 400 command = f"cd {MALCHELA_DIR} && ./target/release/mstrings \"{filepath}\"" result = execute_command(command) return jsonify(result) except Exception as e: logger.error(f"Error in malchela_mstrings endpoint: {str(e)}") return jsonify({"error": f"Server error: {str(e)}"}), 500@app.route("/api/tools/malchela/malhash", methods=["POST"])def malchela_malhash(): """MalChela: Query a hash against VirusTotal and MalwareBazaar.""" try: params = request.json hash_value = params.get("hash", "") if not hash_value: return jsonify({"error": "hash parameter is required"}), 400 command = f"cd {MALCHELA_DIR} && ./target/release/malhash \"{hash_value}\"" result = execute_command(command) return jsonify(result) except Exception as e: logger.error(f"Error in malchela_malhash endpoint: {str(e)}") return jsonify({"error": f"Server error: {str(e)}"}), 500@app.route("/api/tools/malchela/nsrlquery", methods=["POST"])def malchela_nsrlquery(): """MalChela: Query file hash against NIST NSRL known-good database.""" try: params = request.json filepath = params.get("filepath", "") if not filepath: return jsonify({"error": "filepath parameter is required"}), 400 command = f"cd {MALCHELA_DIR} && ./target/release/nsrlquery \"{filepath}\"" result = execute_command(command) return jsonify(result) except Exception as e: logger.error(f"Error in malchela_nsrlquery endpoint: {str(e)}") return jsonify({"error": f"Server error: {str(e)}"}), 500@app.route("/api/tools/malchela/hashit", methods=["POST"])def malchela_hashit(): """MalChela: Generate MD5, SHA1, and SHA256 hashes for a file.""" try: params = request.json filepath = params.get("filepath", "") if not filepath: return jsonify({"error": "filepath parameter is required"}), 400 command = f"cd {MALCHELA_DIR} && ./target/release/hashit \"{filepath}\"" result = execute_command(command) return jsonify(result) except Exception as e: logger.error(f"Error in malchela_hashit endpoint: {str(e)}") return jsonify({"error": f"Server error: {str(e)}"}), 500@app.route("/api/tools/malchela/fileminer", methods=["POST"])def malchela_fileminer(): """MalChela: Scan a directory for file type mismatches and metadata anomalies.""" try: params = request.json dirpath = params.get("dirpath", "") if not dirpath: return jsonify({"error": "dirpath parameter is required"}), 400 command = f"cd {MALCHELA_DIR} && ./target/release/fileminer \"{dirpath}\"" result = execute_command(command) return jsonify(result) except Exception as e: logger.error(f"Error in malchela_fileminer endpoint: {str(e)}") return jsonify({"error": f"Server error: {str(e)}"}), 500
Important note on malhash: Unlike the other tools which take a file path, malhash takes a hash string as its argument. The route reads a hash parameter and passes it directly to the binary. Passing a filepath to malhash will fail silently — a subtle but critical distinction.
mcp_server.py changes
The MalChela tool definitions need to be added to the setup_mcp_server() function, immediately before the return mcp line.
    @mcp.tool(name="malchela_fileanalyzer")
    def malchela_fileanalyzer(filepath: str) -> Dict[str, Any]:
        """
        MalChela: Static file analysis - hashes, entropy, packing detection,
        PE metadata (imports, sections, timestamps), YARA matches, VirusTotal status.
        Best first step for any unknown file.

        Args:
            filepath: Absolute path to the file to analyze

        Returns:
            Analysis report
        """
        return kali_client.safe_post("api/tools/malchela/fileanalyzer", {"filepath": filepath})

    @mcp.tool(name="malchela_mstrings")
    def malchela_mstrings(filepath: str) -> Dict[str, Any]:
        """
        MalChela: String extraction with IOC detection and MITRE ATT&CK mapping.
        Applies Sigma-style detection rules, flags suspicious patterns (registry keys,
        encoded payloads, suspicious DLL+API combos), maps findings to ATT&CK techniques.

        Args:
            filepath: Absolute path to the file to analyze

        Returns:
            String analysis with ATT&CK mappings and IOCs
        """
        return kali_client.safe_post("api/tools/malchela/mstrings", {"filepath": filepath})

    @mcp.tool(name="malchela_malhash")
    def malchela_malhash(hash: str) -> Dict[str, Any]:
        """
        MalChela: Query a file hash against VirusTotal and MalwareBazaar.
        Returns detection ratio, AV verdicts, first/last seen dates, and sample metadata.
        Requires VT_API_KEY env var; MB_API_KEY optional.

        Args:
            hash: MD5, SHA1, or SHA256 hash string to query

        Returns:
            Threat intel results from VirusTotal and MalwareBazaar
        """
        return kali_client.safe_post("api/tools/malchela/malhash", {"hash": hash})

    @mcp.tool(name="malchela_hashit")
    def malchela_hashit(filepath: str) -> Dict[str, Any]:
        """
        MalChela: Generate MD5, SHA1, and SHA256 hashes for a single file.
        Lightweight when you need hashes without full fileanalyzer output.

        Args:
            filepath: Absolute path to the file

        Returns:
            File hashes
        """
        return kali_client.safe_post("api/tools/malchela/hashit", {"filepath": filepath})

    @mcp.tool(name="malchela_fileminer")
    def malchela_fileminer(folderpath: str) -> Dict[str, Any]:
        """
        MalChela: Scan a folder for file type mismatches and metadata anomalies.
        Classifies all files, flags executables disguised as other types.

        Args:
            folderpath: Absolute path to the folder to scan

        Returns:
            File classification and anomaly report
        """
        return kali_client.safe_post("api/tools/malchela/fileminer", {"dirpath": folderpath})

    return mcp
One parameter naming detail worth noting: mcp_server.py receives folderpath from Claude, but must pass it as dirpath in the JSON body to kali_server.py — that’s what the Flask route reads. The tool definition above handles this correctly.
After saving both files, restart the MCP server and restart Claude Desktop.
Testing on an unknown malware sample
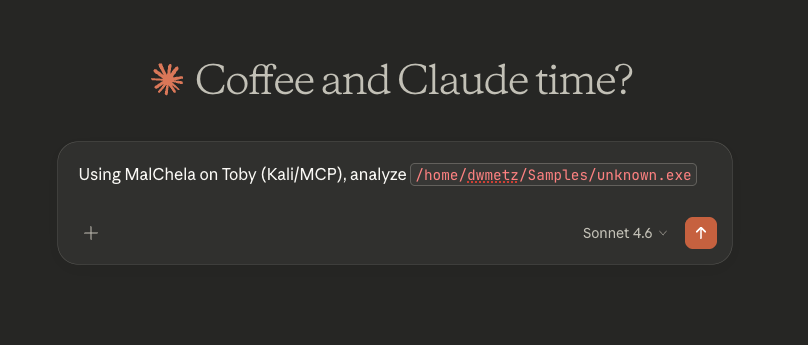
[below is the exact response received from Claude]
I’ll run MalChela analysis on that file via Toby. Let me load the tools first.Tools loaded. Running fileanalyzer first for static analysis, then mstrings for IOC/ATT&CK mapping. Let me verify the path exists:File confirmed on Toby. The MalChela MCP tools use local paths — let me run it directly via the Kali execute_command since the MCP path routing doesn’t map Toby paths. I’ll invoke MalChela’s binaries directly:MalChela binaries found. Running the full suite now:That’s already very telling. Now running mstrings for IOC and ATT&CK mapping:Now let me pull the VirusTotal intel on the hash:That’s a solid picture. Here’s the full analysis breakdown:
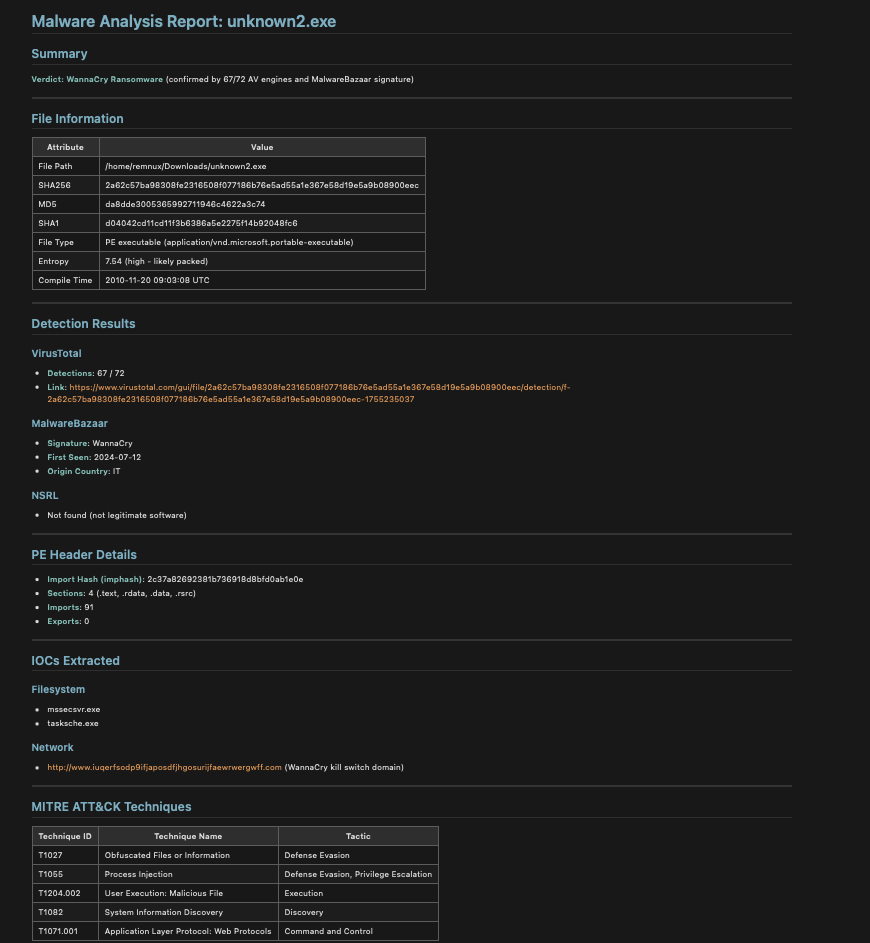
🔴 MalChela Analysis — unknown.exe
Identification
| Field | Value |
| SHA256 | dca40a0120ea176aa65b99c90d171761cb8bf696be4be026941f7f54e3c21635 |
| MD5 | 5e364c1e35445b655ca30ab0c5bc7a4a |
| SHA1 | 0ac9950d00429ff4509c7fb9aa7320a45a0465ea |
| MalwareBazaar Filename | BL 3425005143.bat (disguised as .bat, submitted as .exe) |
| Origin | Poland (PL), submitted anonymously |
| First Seen | 2026-03-03 13:38:42 UTC — very fresh |
🧬 Verdict: GuLoader
39/69 detections on VirusTotal. Multiple vendors confirm this as GuLoader (NSIS-based downloader/injector):
- ESET: NSIS/Injector.ENS trojan
- Malwarebytes: Trojan.GuLoader
- Fortinet: NSIS/Injector.7A4A!tr
- Kaspersky: HEUR:Trojan-Downloader.Win32.Minix.gen
- MalwareBazaar Signature: GuLoader
📦 Static Analysis Highlights
- Entropy: 7.96 — near-maximum, strongly indicating packed/encrypted payload
- Packer: NSIS (Nullsoft Scriptable Install System) wrapper — common GuLoader delivery vehicle
- Compile Timestamp: 2018-12-15 (likely spoofed/stomped)
- Unsigned — no digital signature
- 5 PE sections including .ndata (atypical NSIS section, flagged as suspicious)
- 159 imports, including the dangerous trio:
- GetProcAddress / LoadLibraryExA — dynamic API resolution (evasion)
- ShellExecuteExA — process execution
🎯 MITRE ATT&CK Mappings (from mstrings)
| Technique | ID | Tactic |
| Obfuscated Files or Information | T1027 | Defense Evasion |
| Process Injection | T1055 | Defense Evasion / Privilege Escalation |
| Application Layer Protocol: Web Protocols | T1071.001 | Command and Control |
🌐 Network IOC
- http://nsis.sf.net/NSIS_Error — NSIS error handler URL (confirms NSIS wrapper), not inherently malicious but characteristic of GuLoader’s packaging
Summary
This is a live GuLoader sample — an NSIS-wrapped shellcode injector/downloader commonly used as a first-stage payload to retrieve second-stage malware (often AgentTesla, Remcos RAT, FormBook, etc.). The high entropy, dynamic API loading, and process injection indicators are all consistent with GuLoader’s known behavior. Treat this as active malware — do not execute outside an isolated sandbox.
Approach 2: Persistent MalChela Instructions in OpenCode on REMnux
The REMnux OpenCode integration I described in the previous post worked, but it had one friction point: each new session required re-pasting the MalChela context. OpenCode has a solution for this — the AGENTS.md file.
Place an AGENTS.md file in your working directory (or MalChela’s root directory) and OpenCode will automatically load it as persistent context for every session started from that location. This is the most lightweight way to make MalChela tool-aware without building any infrastructure.
Create the file at /home/remnux/Tools/MalChela/AGENTS.md:
# MalChela Tool Instructions for AI AssistantsMalChela is installed at: /home/remnux/Tools/MalChelaAll tools are Rust binaries. The execution pattern is:cd /home/remnux/Tools/MalChela./target/release/<toolname> <arguments>## Primary Static Analysis Tools| Tool | Binary | Description ||------|--------|-------------|| File Analyzer | fileanalyzer | Hash, entropy, packing detection, PE info, YARA scan, VirusTotal lookup || mStrings | mstrings | String extraction, Sigma rule matching, Regex, MITRE ATT&CK mapping || NSRL Hash Lookup | nsrlquery | Query MD5/SHA1 against the NIST NSRL known-good database || Malware Hash Lookup | malhash | Query a hash against VirusTotal and MalwareBazaar |## Additional Tools| Tool | Binary | Description ||------|--------|-------------|| File Miner | fileminer | Scan directories for file type mismatches and metadata anomalies || Hash It | hashit | Generate MD5, SHA1, and SHA256 for a single file || mzHash | mzhash | Recursively hash all files in a directory || Extract Samples | extract_samples | Extract files from password-protected malware archives |## Recommended WorkflowFor initial triage of an unknown file:1. fileanalyzer - establish baseline: hashes, entropy, PE headers2. mstrings - extract strings, look for IOCs and ATT&CK technique indicators3. malhash - check community threat intelligence4. nsrlquery - confirm or rule out known-good status## Environment Notes- API keys (VT_API_KEY, MB_API_KEY) should be set in the shell environment- MalChela integrates with REMnux tools; use REMnux CLI tools in conjunction as needed- Case management is available via the MalChela GUI if a graphical session is active
When you start an OpenCode session from the MalChela directory, this context is automatically loaded. No manual pasting, no re-briefing.

Once complete I asked it to save the results to the Desktop in markdown.
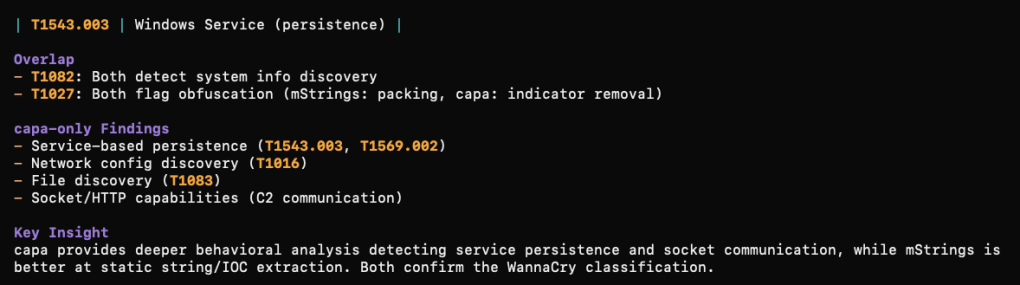
What was cool to me about this approach is that using the installed REMnux tools, you can take the analysis further after MalChela. In my testing I (OpenCode) analyzed a file with mStrings. We then followed up by running capa against the file. From there we could compare what each tool detected and missed in the sample. (screenshot truncated)
Approach 3: MalChela as a Native MCP Server (Mac)
The most powerful integration is running MalChela as its own dedicated MCP server — making its tools directly available to Claude Desktop alongside the Kali server. This is what we built out as mcp-malchela.
The server is a small Node.js project that wraps MalChela’s binaries with proper MCP tool definitions. The key files are index.js (the server logic) and package.json.
package.json:
{ "name": "mcp-malchela", "version": "1.0.0", "description": "MCP server exposing MalChela malware analysis tools", "main": "index.js", "dependencies": { "@modelcontextprotocol/sdk": "^1.0.0" }}
index.js — the server defines each MalChela tool with its input schema, executes the binary when called, and streams back results. Note that malhash is handled differently from the other tools — it receives a hash string rather than a filepath, so the argument routing accounts for that explicitly:
import { Server } from "@modelcontextprotocol/sdk/server/index.js";import { StdioServerTransport } from "@modelcontextprotocol/sdk/server/stdio.js";import { CallToolRequestSchema, ListToolsRequestSchema } from "@modelcontextprotocol/sdk/types.js";import { execSync } from "child_process";import path from "path";const MALCHELA_DIR = process.env.MALCHELA_DIR || "/Users/dmetz/GitHub/MalChela";const RELEASE_DIR = path.join(MALCHELA_DIR, "target", "release");const server = new Server( { name: "mcp-malchela", version: "1.0.0" }, { capabilities: { tools: {} } });const tools = [ { name: "malchela_fileanalyzer", description: "Analyze a file: hashes, entropy, packing detection, PE headers, YARA scan, VirusTotal lookup", inputSchema: { type: "object", properties: { filepath: { type: "string", description: "Absolute path to the file to analyze" } }, required: ["filepath"] } }, { name: "malchela_mstrings", description: "Extract strings from a file, apply Sigma rules and Regex patterns, map to MITRE ATT&CK", inputSchema: { type: "object", properties: { filepath: { type: "string", description: "Absolute path to the file to analyze" } }, required: ["filepath"] } }, { name: "malchela_malhash", description: "Query a hash against VirusTotal and MalwareBazaar", inputSchema: { type: "object", properties: { hash: { type: "string", description: "MD5, SHA1, or SHA256 hash string to query" } }, required: ["hash"] } }, { name: "malchela_nsrlquery", description: "Query a file hash against the NIST NSRL known-good database", inputSchema: { type: "object", properties: { filepath: { type: "string", description: "Absolute path to the file to query" } }, required: ["filepath"] } }];server.setRequestHandler(ListToolsRequestSchema, async () => ({ tools }));server.setRequestHandler(CallToolRequestSchema, async (request) => { const { name, arguments: args } = request.params; const env = { ...process.env }; const binaryMap = { malchela_fileanalyzer: "fileanalyzer", malchela_mstrings: "mstrings", malchela_malhash: "malhash", malchela_nsrlquery: "nsrlquery" }; const binary = binaryMap[name]; if (!binary) throw new Error(`Unknown tool: ${name}`); // malhash takes a hash string; all other tools take a filepath const arg = name === "malchela_malhash" ? args.hash : args.filepath; const cmd = `cd "${MALCHELA_DIR}" && ./target/release/${binary} "${arg}"`; try { const output = execSync(cmd, { env, encoding: "utf8", maxBuffer: 10 * 1024 * 1024 }); return { content: [{ type: "text", text: output }] }; } catch (error) { return { content: [{ type: "text", text: error.stdout || error.message }] }; }});const transport = new StdioServerTransport();await server.connect(transport);
Setup:
mkdir ~/mcp-malchelacd ~/mcp-malchela# create index.js and package.json as abovenpm install
claude_desktop_config.json — with both servers configured:
{ "mcpServers": { "mcp-kali-server": { "command": "ssh", "args": [ "-i", "/Users/dwmetz/.ssh/id_ed25519", "dwmetz@192.168.10.89", "mcp-server" ], "transport": "stdio" }, "malchela": { "command": "node", "args": ["/Users/dmetz/mcp-malchela/index.js"], "env": { "MALCHELA_DIR": "/Users/dmetz/Tools/MalChela" } } }}
Restart Claude Desktop and both MCP servers will be active and available in every session.
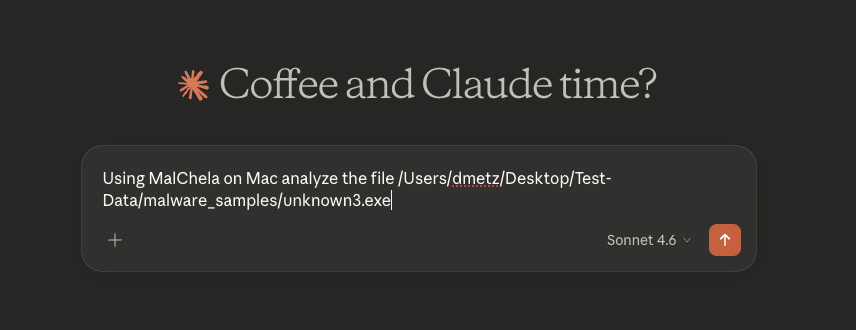
I'll load the MalChela tools and run analysis on that file on your Mac.Searched available toolsStarting with fileanalyzer for the full static analysis pass.FileanalyzerVirusTotal flags it as malicious. Let me pull the full VT/MalwareBazaar intel and then run strings analysis.MalhashConfirmed SalatStealer. Let me run strings analysis to surface IOCs and ATT&CK mappings.Ran 5 commands, used malchela integrationThat's a solid picture. Here's the full breakdown:
🔴 unknown3.exe — SalatStealer (Confirmed Malicious)
Identity
| Field | Value |
|---|---|
| SHA256 | e0c90f401ae5d23a551f2d75a826cec7f187a6b7f0da2d24565c880e027ae9a3 |
| MD5 | cfcd64360a0b0c3185f9a48b1dbe1bdc |
| Family | SalatStealer (Trojan.PWS.Salat) |
| VT Detections | 33/68 — confirmed malicious |
| First Seen | 2026-03-03 15:37 UTC (very fresh) |
| Origin | NL (Netherlands), reported by abuse.ch |
| Language | Go (Golang) — evident from stdlib and module paths |
| Architecture | i386 (32-bit PE) |
| Packer | UPX (MalwareBazaar notes this is the UPX-decompressed form; original packed SHA256: 30a50cc0f7...) |
| Code Signing | Absent |
| Compile Timestamp | Epoch zero (1970-01-01) — deliberately zeroed/spoofed |
MITRE ATT&CK Coverage (11 Techniques)
| Technique | ID | What was found |
|---|---|---|
| Obfuscated Files / Packing | T1027 | DOS stub + packer artifact |
| OS Credential Dumping (LSASS) | T1003.001 | String matches |
| WMI Execution/Discovery | T1047 | ffwmic reference |
| Process Injection | T1055 | Injection-capable imports |
| Scripting Interpreter | T1059 | JSON/script interpreter refs |
| Web Protocol C2 | T1071.001 | WebSocket + HTTP/2 libs, hardcoded domains |
| System Info Discovery | T1082 | System enumeration strings |
| File & Dir Discovery | T1083 | File path enumeration |
| Ingress Tool Transfer | T1105 | Download capability |
| Unsecured Credentials | T1552 | password, username, loginPBE, passwordSet |
Notable IOCs from Strings
Clients\DiscordTokens.txt— Discord token harvestingmoz_cookiesSQL query — Firefox cookie theftyandexbrowser— Yandex Browser credential targeting*main.loginPBE— Login/credential parsing function- WebSocket C2 comms —
*websocket.netDialerFunc,*websocket.netError - WMI usage — likely for system enumeration pre-exfil
Bottom Line
This is a Go-compiled password/credential stealer targeting browsers (Firefox cookies, Discord tokens, Yandex Browser), using WebSocket for C2, with WMI-based discovery. It was UPX-packed (this is the unpacked copy), has a zeroed compile timestamp to defeat timestamp-based triage, and was submitted to MalwareBazaar just hours ago — very fresh sample. Do not execute in any environment without proper isolation.
VT permalink for full AV breakdown: https://www.virustotal.com/gui/file/e0c90f401ae5d23a551f2d75a826cec7f187a6b7f0da2d24565c880e027ae9a3/detection
Comparing the Three Approaches
| Kali MCP (Toby) | OpenCode AGENTS.md | MalChela MCP | |
|---|---|---|---|
| Platform | Kali (Raspberry Pi) | REMnux | macOS |
| Persistence | Full (MCP server definition) | Full (file-based) | Full (MCP server definition) |
| Setup complexity | Medium (SSH + server install + file edits) | Low (one markdown file) | Medium (Node.js server) |
| AI integration depth | Structured tool calls | Natural language with context | Structured tool calls |
| Best for | Field analysis with Toby | REMnux-primary workflows | Mac-based analysis with MalChela |
All three approaches solve the same core problem from the original post: making the AI reliably aware of your tools without re-briefing it every session. The right choice depends on your primary analysis environment — or, if you’re like me, you end up running all three.
All of the configuration files discussed here — including the MCP server setup and the are available in the MalChela repository on GitHub. Clone or pull the latest and you should be ready to go. As always, if you run into issues or have ideas for where to take the MCP integration next, open an issue or drop me a note.